Yes, another boring project that runs kernel in browser with WebAssembly, but seL4 microkernel this time :)
I have read so many strange blogs about running strange programs and operating systems in WebAssembly (which i likes), such as running DOOM inside a PDF [1] or booting old operating systems directly in the browser [2]. It always felt like something extremely low-level and complicated that I cannot do without devoting a lot time.
With Claude’s Fabel 5 model back, I finally decided to see if I could run seL4 in a browser myself. In the beginning I expected Claude to generate a huge amount of code, but it turned out that most of the hard work had already been done by existing open-source projects. There was no need to reinvent anything. The main task was simply connecting the output of one layer to the input of the next. In the end, it only took two evenings with AI.
https://sel4.run
The final boot chain looks like this:
Broswer WASM -> TinyEMU -> OpenSBI -> seL4 elfloader -> seL4 kernel -> root task
One thing I learned from this project is that building something yourself is one of the best ways to understand it. Before this, booting an operating system from bare hardware felt mysterious. After putting all the pieces together, it feels much less intimidating, especially with AI helping along the way.
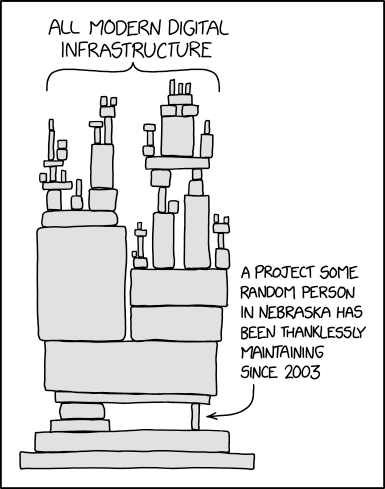
Another observation is that while AI has become much more capable over the past few years, a large part of its productivity actually comes from decades of software engineering infrastructure. AI cannot writing everything from scratch. It stands on top of an enormous ecosystem of compilers, libraries, build systems, and tools. That famous FFmpeg dependency diagram comes to mind. It’s a good reminder to appreciate all of the infrastructure that makes modern software possible.
So this post walks through how all these pieces fit together. The full source code is available at: https://github.com/ChuanyuXue/sel4.run
The first step is compiling the TinyEMU virtual machine into WebAssembly so it can run inside the browser.
To understand WebAssembly, it helps to go back to the first C programming lecture in college: how source code becomes machine code that the CPU can execute.
Broadly speaking, programming languages can be divided into two categories.
Interpreted languages, such as Java and Python, rely on an interpreter (which is itself a program) to translate code while it runs.
Compiled languages translate the entire program into machine code ahead of time.
Compiled programs are usually much faster because translation only happens once. My intuition is that the closer the input format is to machine code, the cheaper the translation becomes. In the extreme case, if the input is already machine code, there is nothing left to translate.
WebAssembly is designed to be very close to machine code. Languages like C, C++, and Rust can all be compiled into WebAssembly. The browser’s WASM runtime then efficiently translates it into native machine instructions for the CPU, with very little overhead.
For example, consider a simple C program:
#include <stdio.h>

int main() {
    printf("Hello, World!\n");
    return 0;
}
You might first try compiling it with Clang. Unfortunately, this immediately fails:
clang --target=wasm32 main.c -o hello.wasm
main.c:1:10: fatal error: 'stdio.h' file not found
    1 | #include <stdio.h>
      |          ^~~~~~~~~
1 error generated
The reason is that the wasm32 target does not provide a standard C library by default. In practice, most projects use Emscripten [3]:
emcc main.c -o hello.html
Emscripten generates three files:
hello.wasm: the compiled WebAssembly binaryhello.js: JavaScript glue code that loads the WASM modulehello.html: a simple web pageThe .wasm file is just binary, much like a native .o object file. The JavaScript code is responsible for loading it into the browser.
Open the generated HTML page, check the browser console, and you’ll see the hello world.
Running an operating system in the browser is really just applying the same idea to an emulator. Instead of compiling a small C program into WASM, we compile an emulator such as QEMU.
For this project I chose TinyEMU [4] instead of QEMU. QEMU is a fantastic project, but it is also very large. Since I only wanted to boot a microkernel rather than emulate an entire desktop operating system, TinyEMU was much easier to understand. Also, seL4 already uses QEMU by default, so I wanted to try something different. The build happens in tools/TinyEmu/Makefile.js and which compiles TinyEMU into:
js/riscvemu64-wasm.js
js/riscvemu64-wasm.wasm
I was curious why the file is called Makefile.js instead of Makefile. Claude explained that it is simply used to distinguish the WASM build from the native build.
Before choosing an emulator, there is another decision: which architecture to target. ARM is what I know best, but I picked RISC-V simply because it is easier to work with.
One interesting thing about RISC-V is that operating systems do not boot directly on the hardware. There is an additional privilege level called Machine Mode (M-mode), which is responsible for CPU initialization, timers, the console, and reading the device tree.
Operating systems run in Supervisor Mode (S-mode), and they rely on an SBI [6] implementation provided by M-mode.
OpenSBI [5] is that implementation. You can think of it as firmware that sits between the hardware and the operating system.
The main build logic lives in: sel4.run/opensbi.cmake . It embeds the seL4 elfloader into OpenSBI as its firmware payload and produces a bootable binary.
The boot sequence looks like this:
 TinyEMU loads the firmware
    -> OpenSBI starts
    -> OpenSBI jumps to the seL4 elfloader
    -> elfloader loads the kernel and rootserver
    -> seL4 boots
Although this sounds straightforward, this stage caused most of the problems.
Most of them were macOS build issues. If you are doing this without AI, I strongly recommend using Linux or Docker instead of building everything natively on macOS.
The first issue is that OpenSBI 1.9 and newer require the firmware to be linked as a PIE (Position Independent Executable). Unfortunately, the riscv64-elf-ld distributed through Homebrew does not support this feature, so the build fails.
Another subtle issue comes from OpenSBI’s fw_payload mode. It embeds an external payload into the firmware, but its Makefile does not treat FW_PAYLOAD_PATH as a build dependency. As a result, the firmware may silently reuse an old embedded payload even though the build succeeds.
The only reliable solution was to run make clean before every rebuild so OpenSBI is forced to embed the latest elfloader.
There were also some emulator compatibility issues.
Immediately after booting, OpenSBI reads several RISC-V CSRs (mvendorid, marchid, and mimpid) to identify the processor. TinyEMU did not implement these registers, causing an illegal instruction exception. AI fixed this by patching TinyEMU.
Another interesting bug involved the HTIF console driver. OpenSBI expects reg[0] to contain fromhost and reg[1] to contain tohost, while TinyEMU generated the device tree in the opposite order. The device tree had to be modified to match OpenSBI’s expectations.
These were all fairly tedious problems. I honestly think it would have taken me months to debug them manually.
From this point onward, things become much easier because everything is already part of the official seL4 toolchain.
The elfloader is the official seL4 bootloader, located in:
ELF-loader started on (HART 0) (NODES 1)
Looking for DTB in CPIO archive...found
ELF-loading image 'kernel' to 80200000
ELF-loading image 'rootserver' to 80221000
Enabling MMU and paging
Jumping to kernel-image entry point...
Since the MMU is still disabled, all addresses in the log are physical addresses. After loading, memory looks roughly like this:
0x80000000  OpenSBI(M-Mode firmware, PMP-protected, resident)
0x80200000  kernel      <- copied here
0x80221000  rootserver  <- copied here, right after kernel
    ...
0x81000000  elfloader + CPIO
Everything in this stage comes directly from the official seL4 project. I did not modify a single line of code.
Once the kernel starts, the remaining boot process is surprisingly simple.
Jumping to kernel-image entry point...

Init local IRQ
no PLIC present, skip hart specific initialisation
Bootstrapping kernel
Initializing PLIC...
no PLIC present, skip platform specific initialisation
available phys memory regions: 1
  [80200000..90000000)
reserved virt address space regions: 3
  [ffffffc080200000..ffffffc080220000)   <- kernel
  [ffffffc080220000..ffffffc0802204a8)   <- device tree copy
  [ffffffc080221000..ffffffc08035b000)   <- rootserver image
Booting all finished, dropped to user space
Unlike Linux, seL4 [7] is a microkernel. It does not initialize a large number of device drivers, mount filesystems, create process tables, or launch kernel services during boot.
Instead, it initializes interrupts and timers, reserves a small memory region for itself, creates the initial root task, and switches into user space.
TinyEMU does not emulate a PLIC, so those initialization steps are simply skipped.
The remaining memory is provided as untyped memory, ready to be retyped into kernel objects by user space.
The static parts of the system are straightforward.
TinyEMU is compiled into WebAssembly.
The kernel, elfloader, OpenSBI, musl, and other components are all ordinary RISC-V binaries, so they can be built ahead of time.
The only component that changes frequently is the root task, which contains the user’s application.
Ideally, I wanted users to write C code directly in the browser, click a button, and immediately boot it inside seL4.
That means the browser itself needs a compiler.
I expected to find an existing WASM version of Clang, but surprisingly I couldn’t find one that fit my needs.
In the end, AI used Emscripten [8] to compile LLVM into WebAssembly locally.
The browser now performs the following steps:
1. clang.wasm   compiles your main.c
2. lld.wasm     links the rootserver ELF
3. JS code      builds the CPIO archive (kernel.elf + kernel.dtb + rootserver)
4. clang.wasm   assembles a tiny .incbin stub  -> archive.o
5. lld.wasm     relinks the elfloader          -> elfloader ELF
6. llvm-objcopy flattens it to binary and prepends the fixed 2MB OpenSBI image
This stage also had plenty of unexpected problems.
For example, Clang normally expects to invoke the system linker as a separate POSIX process, which is not available inside WASM. The project therefore calls lld directly.
Another surprisingly annoying issue was that assembly files had to use the .s extension instead of .S.
It took quite a bit of patching, but eventually everything worked.
The best part is that the entire workflow happens inside the browser.
Downloading, compiling, linking, packaging, and booting all happen locally.
There is no backend server at all.
My hosting cost is exactly $0.
[1] DOOM in PDF https://doompdf.pages.dev/doom.pdf
[2] copy.sh https://copy.sh/v86/
[3] emscripten https://emscripten.org
[4] tinyemu: https://bellard.org/tinyemu/
[5] openSBI: https://github.com/riscv-software-src/opensbi
[6] RISC-V SBI: https://github.com/riscv-non-isa/riscv-sbi-doc
[7] seL4: https://sel4.systems
[8] Emception: https://github.com/jprendes/emception
skewcy@gmail.com